Creating a VS Code Extension Pack and Publishing through a GitHub Action
One of the features of VS Code is the ability to install extensions built with the extension API to extend the default functionality. Over time, you may install may extensions to help you with development, but what happens if you get a new machine and have to do a clean install of VS Code? Is there an easier way than installing each extension one by one?
I found myself in that very position. Well, I did a clean install of a new macOS version. While searching for all of the extensions I needed, I started to document which ones I was adding. It was at this time that I discovered extension packs.
What is an extension pack? An extension pack is a set of extensions bundled together that will all install at the same time. It is an easy way of sharing favourite extensions or a set of extensions for a particular development language. For example, say you develop in C# and deploy to Azure App Services and Azure Function Apps. You could create an extension pack that contains the C#, Azure App Service and Azure Functions extensions.
Installing the Tools Needed
To get started creating Extension Packs, you will need to install the Yeoman scaffolding CLI tools along with the code generator for VS Code. Installing those NPM packages can be done with the following command:
$ npm install -g yo generator-codeCreating an Extension Pack
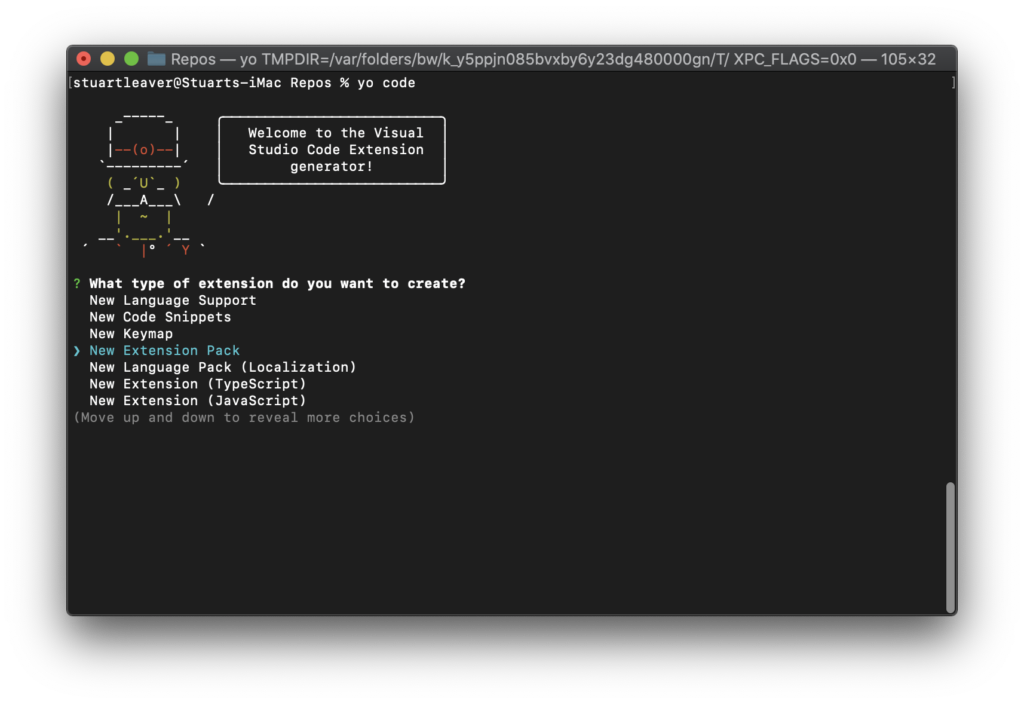
With the tools installed in the previous section, you can run the following command to get started:
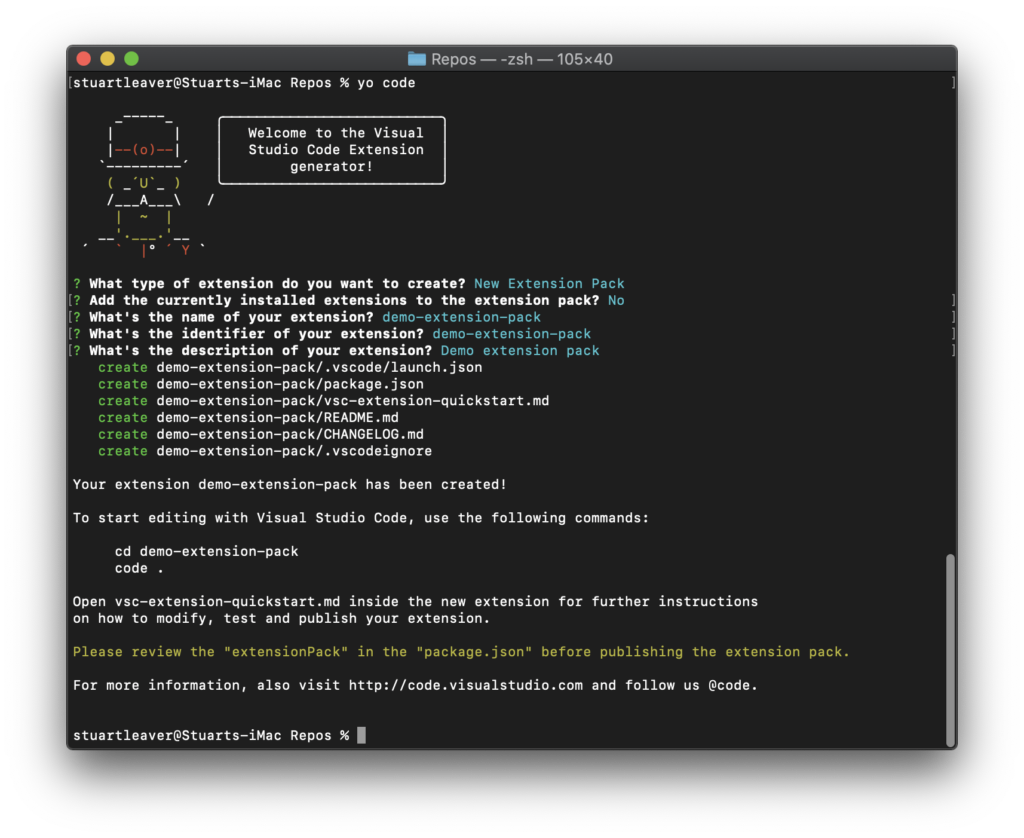
$ yo codeYou will then be able to select ‘New Extension Pack’ from the prompt. Then after filling in some more information needed to create the scaffolding, an empty Extension Pack project will be created.
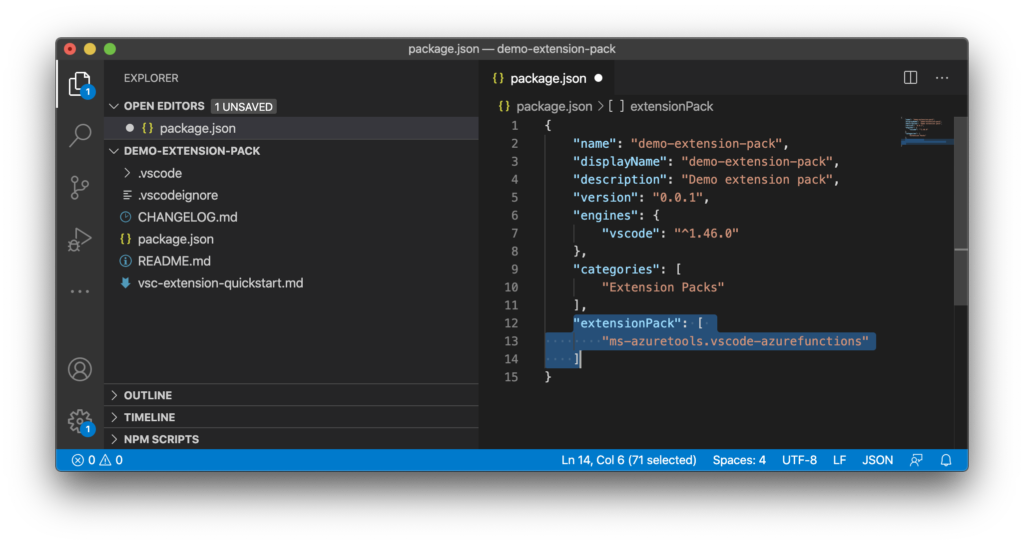
Once you open the project, the file to look at is package.json. Within there, the critical property is extensionPack.
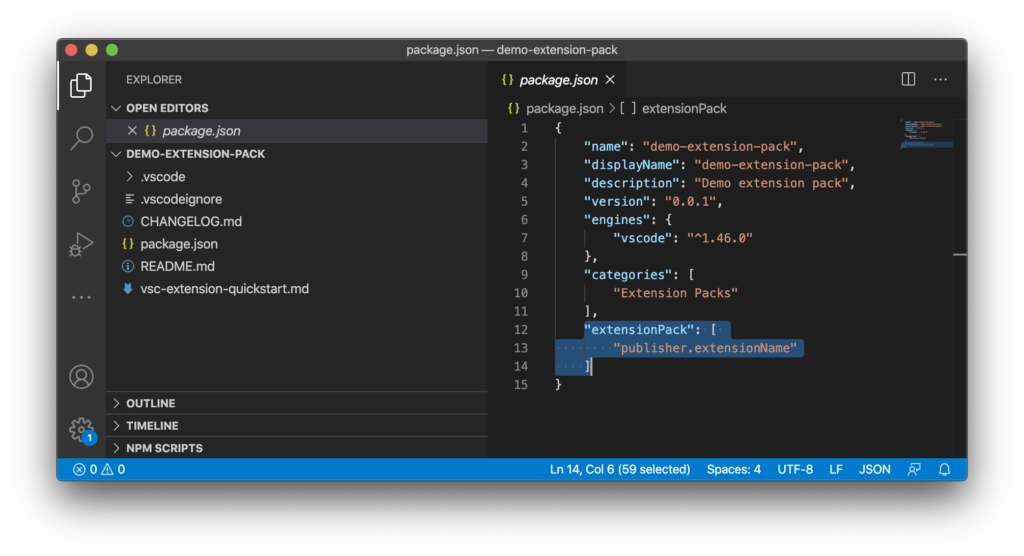
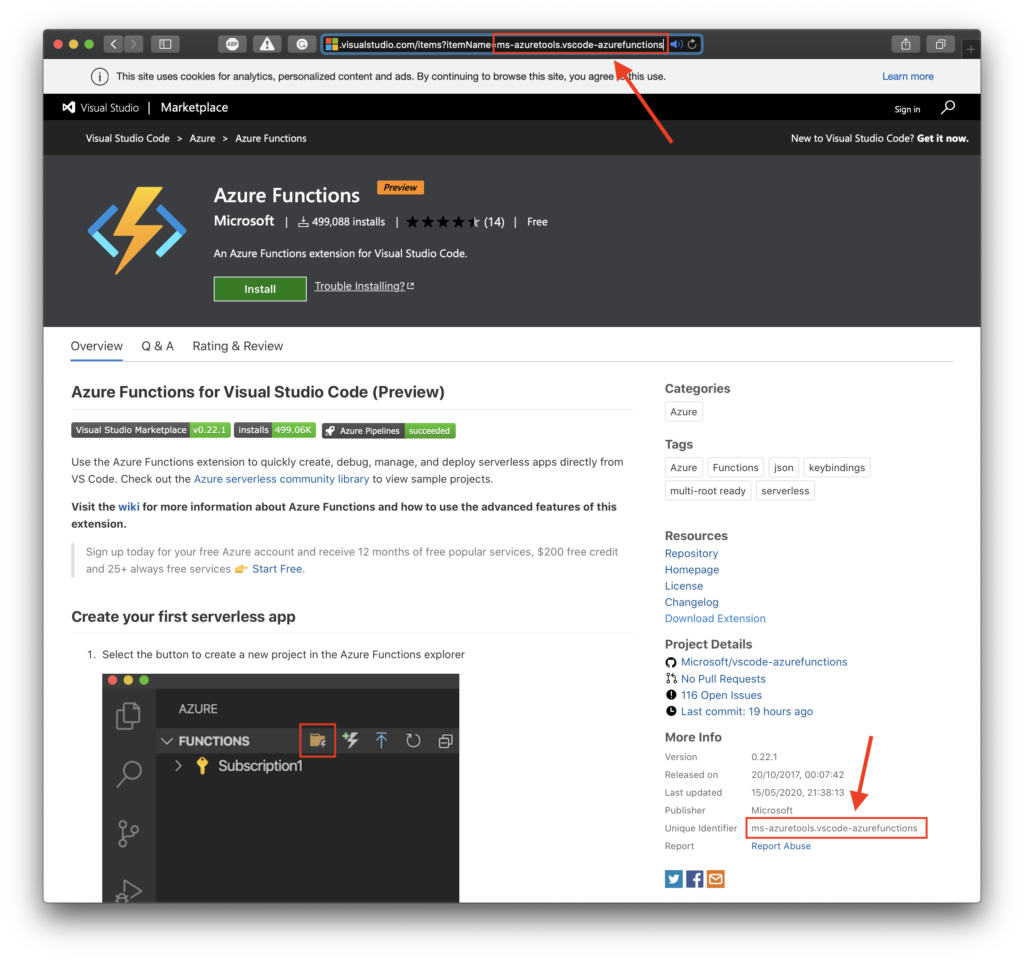
It is now time to start adding the extensions that you use, or thing will be helpful for others. As you will see, the format if adding an extension is publisher.extensionName. You can use the VS Code Marketplace to find the unique identifiers for the extensions you wish to add.
Building the Extension Pack
Before publishing your newly created Extension Pack to the Marketplace, you will need to create a VSIX package. This VSIX package will also allow you to share your Extension Pack with others outside of the Marketplace.
To create the VSIX package, you will need to install an NPM package named vsce. Having made sure you have Node.js installed, you can run the following command:
$ npm install -g vsceWith the vsce package installed, you can package your Extension Pack with this command:
$ vsce packagePublishing the Extension Pack
You could publish your Extension Pack manually, but why do that when you could use GitHub Actions. How you set up your pipeline is down to personal preference based on your branching strategy, and so the following will concentrate on the actual publishing.
The first thing you will need to do is to get a Personal Access Token (PAT). So you will need to ensure that you have an Azure DevOps Organisation as Azure DevOps is how extensions are published. Instructions on this can are in the documentation. Once you have this, you will need to add it as a secret in your GitHub repositories settings:

More extensive details on publishing extensions are in the documentation. The commands that apply the most here though when deploying through a GitHub Action are:
$ vsce package
$ vsce publish -p <PAT>
The -p is an optional parameter but used here for authentication. Within the Github Action, you can publish with just four simple steps:
Check-out the repository so that the job can access it:
- name: 'Checkout GitHub Action'
  uses: actions/checkout@v2
Setup, the version of Node.js, to use as part of the job:
- name: Setup Node ${{ env.NODE_VERSION }} Environment
  uses: actions/setup-node@v1
  with:
    node-version: ${{ env.NODE_VERSION }}
Install the vsce NPM package:
- name: Install the vsce npm package
  run: |
    npm install
    npm install -g vsce
Run the vsce commands that will package and publish the extension pack:
- name: Package the extension pack
  run: |
    vsce package
    vsce publish -p ${{ secrets.VSCODE_MARKETPLACE_TOKEN }}
The full Action using a real Extension Pack that is published to the Marketplace this way is here. You can also browse the other Actions used to develop on a separate branch, and so keeping the main branch inline with what is published and so that every commit is not published.
Once the job has completed, it will take a few minutes to appear in the Marketplace as it needs to go through the Marketplace backend. You can check the progress if you navigate to your Manage Publishers & Extensions.
The repository for the Extension Pack I created for extensions that I think help with .NET and Azure development is on my GitHub account here.
Also, take a look at the extension which is named .NET & Azure Extension Pack in the Marketplace. Maybe you want to try it out and leave a review!
